
How to Create and Use Self-Scheduling Links
How to Create and Use Self-Scheduling Links
A self-scheduling link lets a candidate pick an interview time on their own, instead of going back and forth over email to find a slot. It works like Calendly: you configure the available times and the interviewers, and the candidate clicks the link from your email and self-books a slot that fits both sides.
Where self-scheduling links live
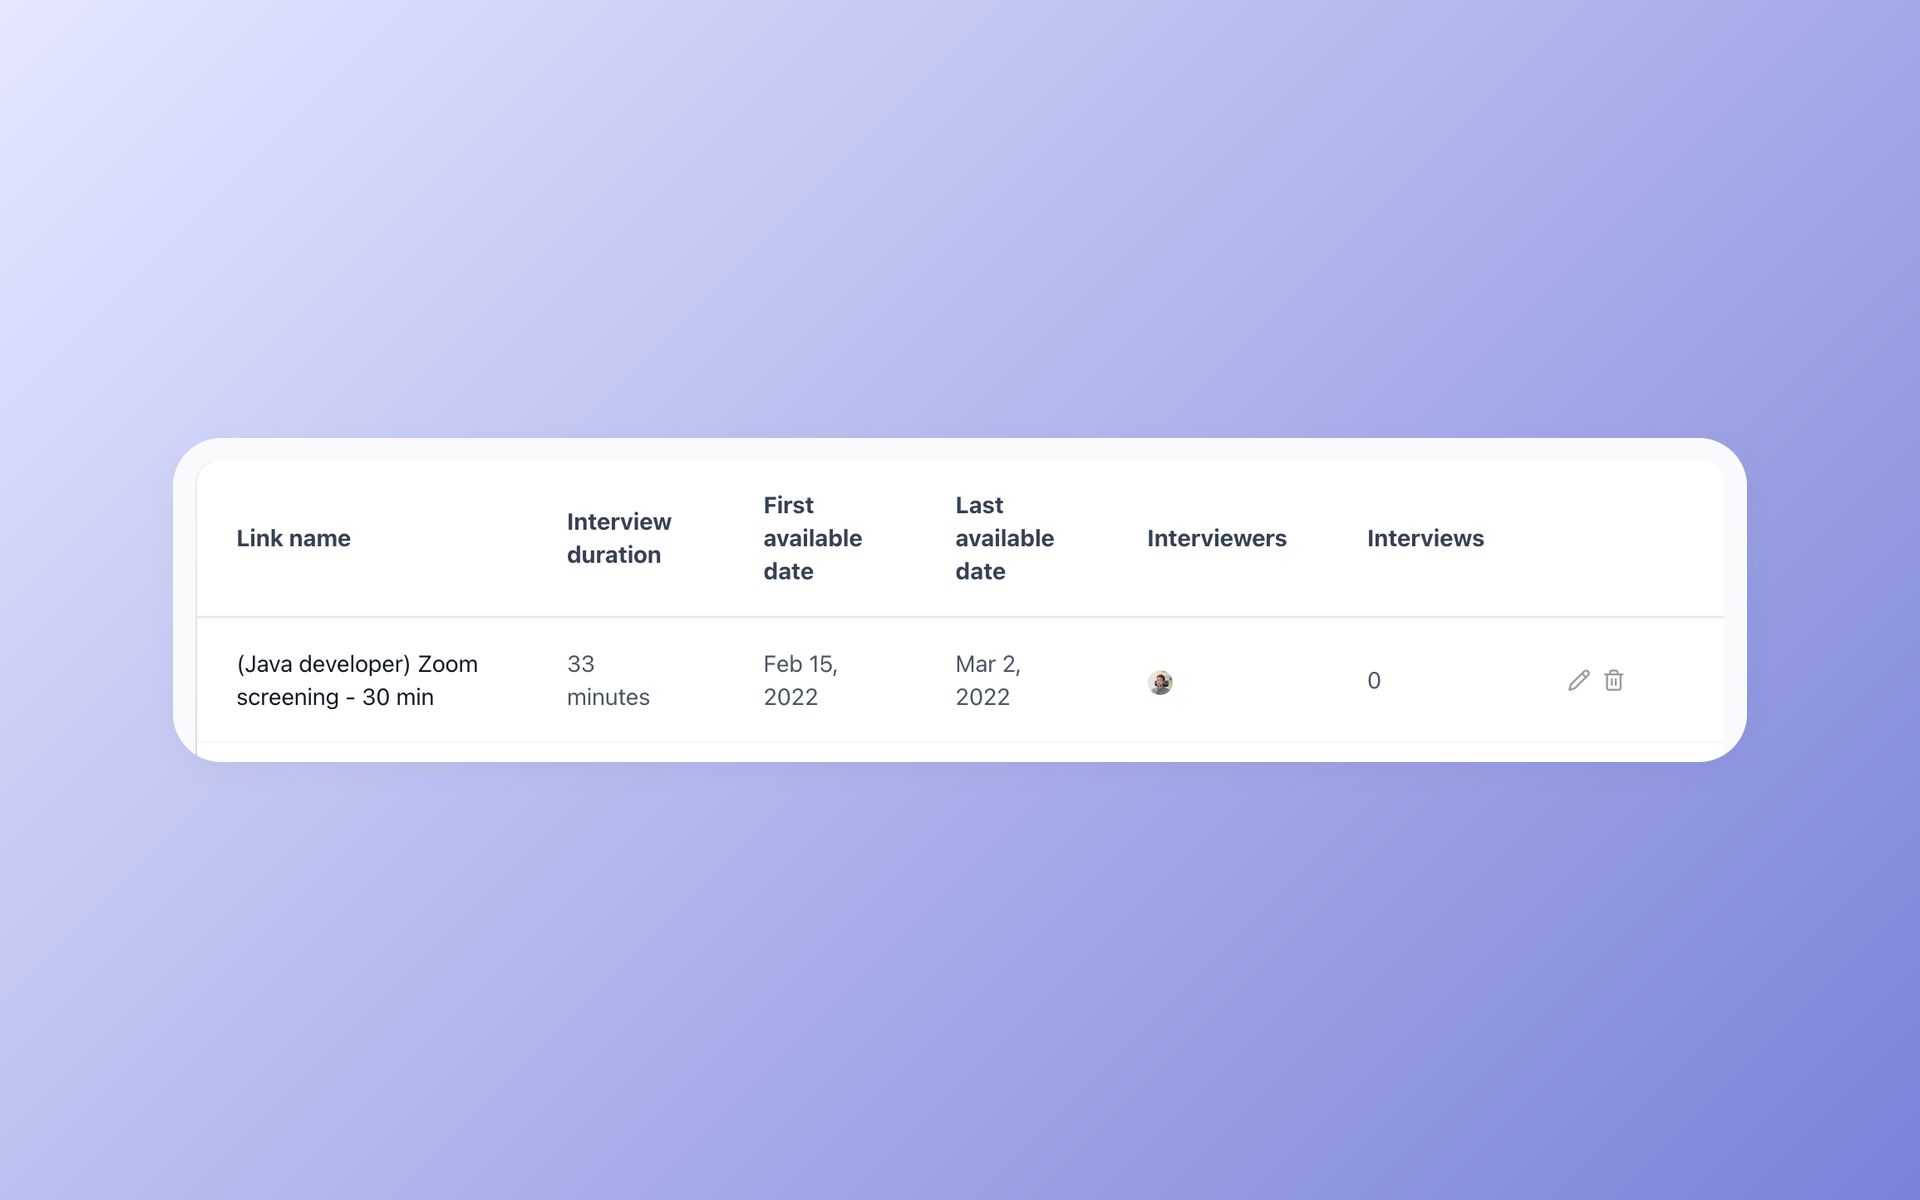
Self-scheduling links are managed in Settings > Self-scheduling links. From this page you can review the links you have already created and start a new one.
Create a self-scheduling link
- Open Settings > Self-scheduling links.
- Start a new link from the page.
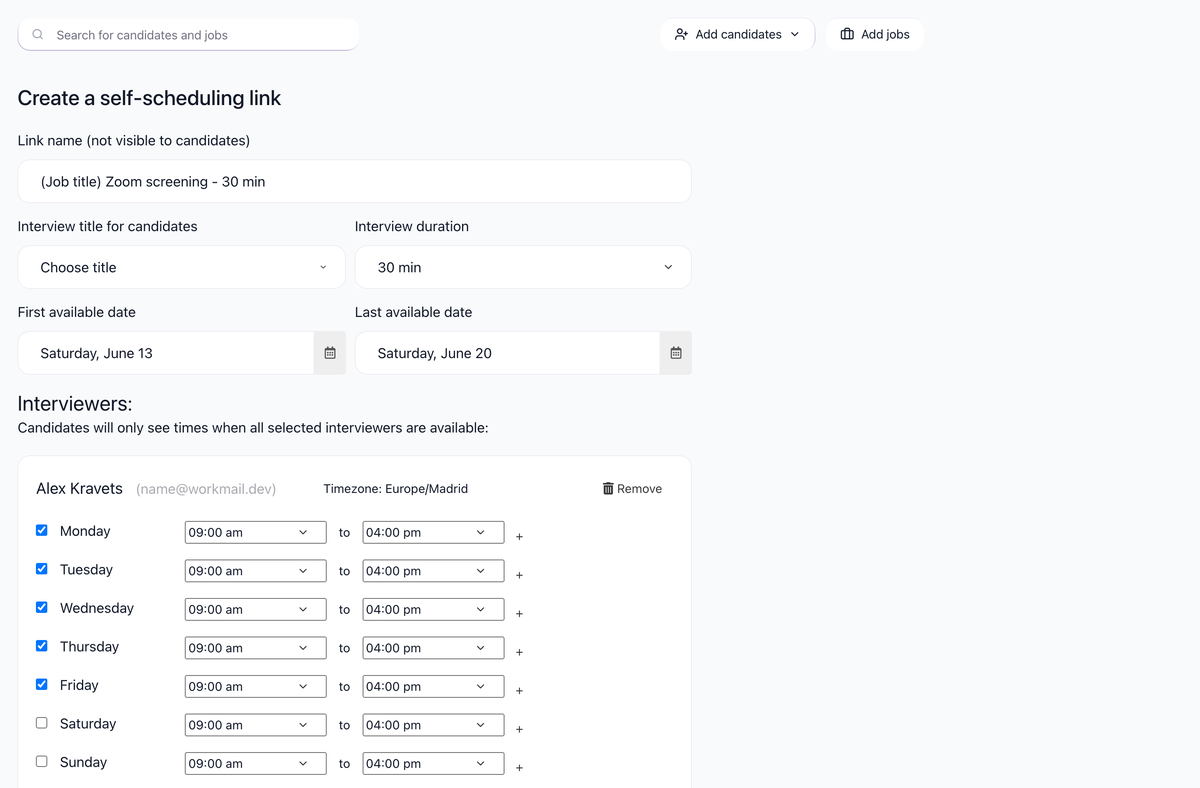
- In the form, fill in the typical fields for a scheduling link, including:
- Link name - an internal label so you can find this link again later. It is not shown to candidates.
- Interview title - the title candidates see for the interview.
- Interview duration - how long each slot lasts.
- Interview timezone - the timezone used by the link.
- Date window - the first and last dates during which candidates can pick a slot.
- Location and Call link - where the interview happens (for example a video meeting URL).
- Interviewers - one or more team members whose availability backs this link. Candidates will only see times when every selected interviewer is available.
- Weekly availability per interviewer - the days and time ranges each interviewer is open for, in that interviewer's timezone.
- Save the link.
How candidates use the link

The link is meant to be inserted into your emails (the email template editor supports self-scheduling link insertion). When a candidate opens the link, they see the slots that match the configured interviewers, the date window, and the duration, and they pick one to self-book the interview.
Updated on: 18/06/2026
Thank you!