
How to Import Candidates from CSV
How to Import Candidates from CSV
Import candidate data from spreadsheets into 100Hires with column mapping and error checking.
How to import
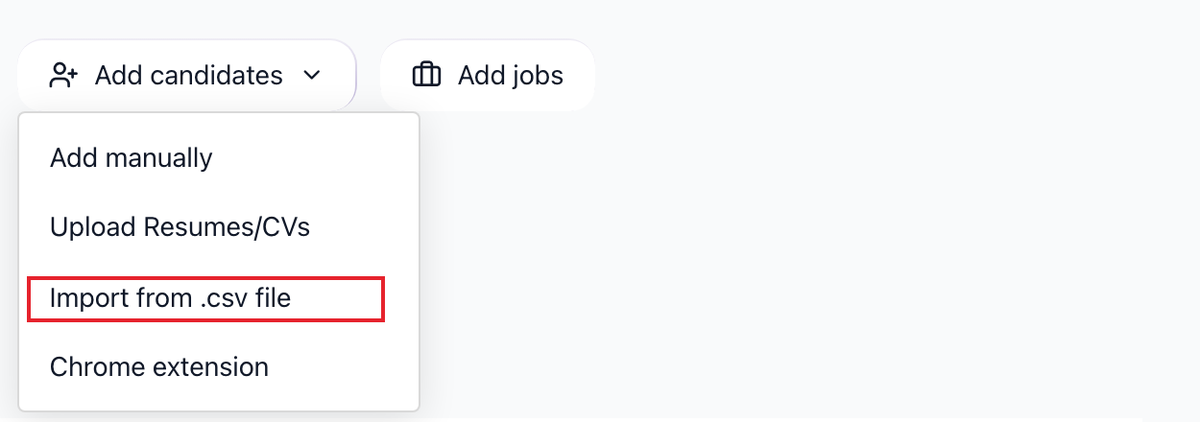
- Click Add Candidates in the header
- Select Import from CSV File from the dropdown
- Drag and drop your CSV file
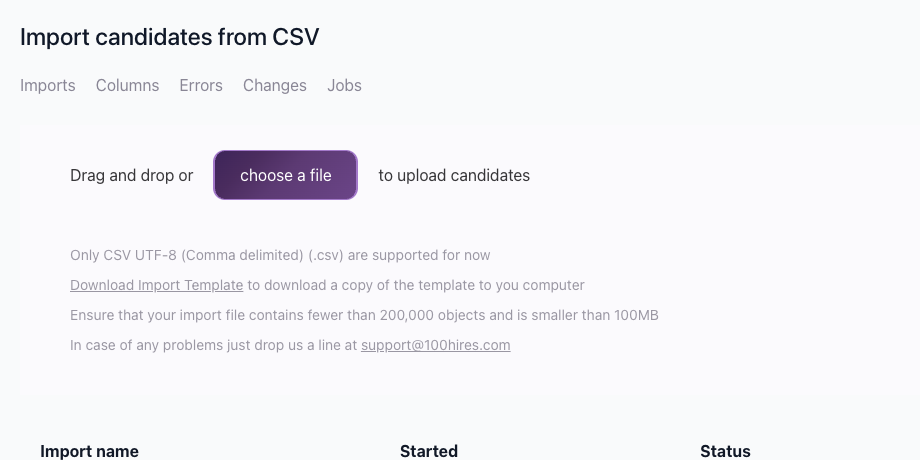
Direct link: Import from CSV
Import steps
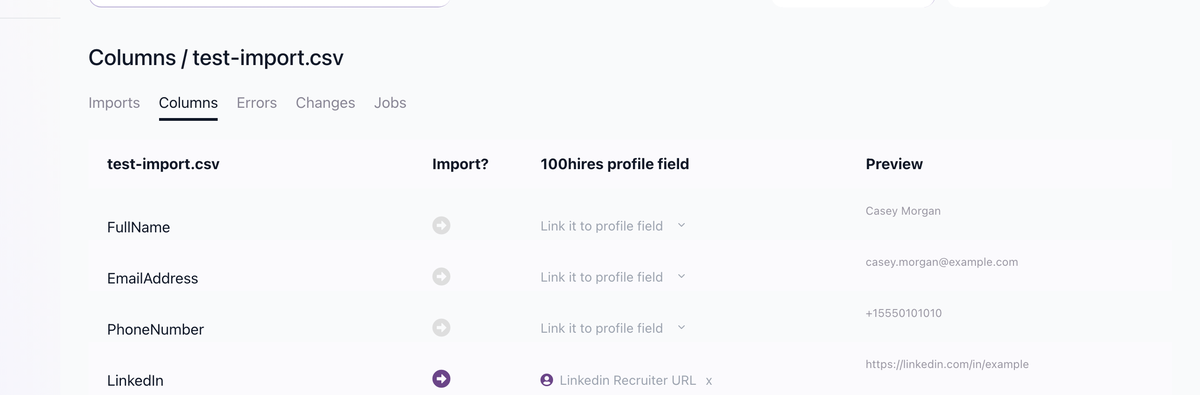
Step 1: map columns
Match your CSV columns to 100Hires profile fields:
- Select the 100Hires field for each CSV column

- Skip columns you don't want to import
- Standard fields: First name, Last name, Email, Phone
- Custom profile fields are also available
Step 2: review errors
The Errors tab shows:
- Missing required information
- Invalid email formats
- Duplicate entries
- Other data issues
Fix errors in your CSV and re-upload, or proceed with valid rows only.
Step 3: review changes
The Changes tab shows which rows match candidates you already have, and exactly which fields will be overwritten. Review it before confirming.
How 100Hires recognizes an existing candidate. A row is matched against your existing candidates by any of these three, so you only need one of them in the file:
- Candidate ID - the 100Hires internal id, available via Export candidates to CSV
- Email address
- LinkedIn URL
A row that matches none of the three creates a new candidate.
Mapping tip. First name, Last name, Email and LinkedIn URL are detected automatically from your column headers. The Candidate ID column is not - on the mapping step select the matching profile field for it yourself, otherwise the ids in your file are ignored and every row is imported as a new candidate. This matters most in the export-edit-reimport workflow: export candidates to CSV, edit the file, then map the Candidate ID column when you import it back.
Step 4: assign to job
Optionally assign imported candidates to a job:
- Select a job from the dropdown
- Choose a pipeline stage

- The system automatically assigns all imported candidates
Step 5: complete import
Click Finish to create the candidates.
CSV format tips
- Include a header row with column names
- Use UTF-8 encoding for special characters
- Use comma as delimiter
- Wrap text containing commas in quotes
Example CSV structure
First Name,Last Name,Email,Phone,LinkedIn
John,Smith,john@example.com,555-1234,linkedin.com/in/johnsmith
Jane,Doe,jane@example.com,555-5678,linkedin.com/in/janedoe
Adding source tags
During import, add a source to track where candidates came from:
- Complete the import
- Select all imported candidates
- Use the Sources bulk action to add a source tag

Updated on: 07/08/2026
Thank you!